1. Rotating Solar Panel Mounts
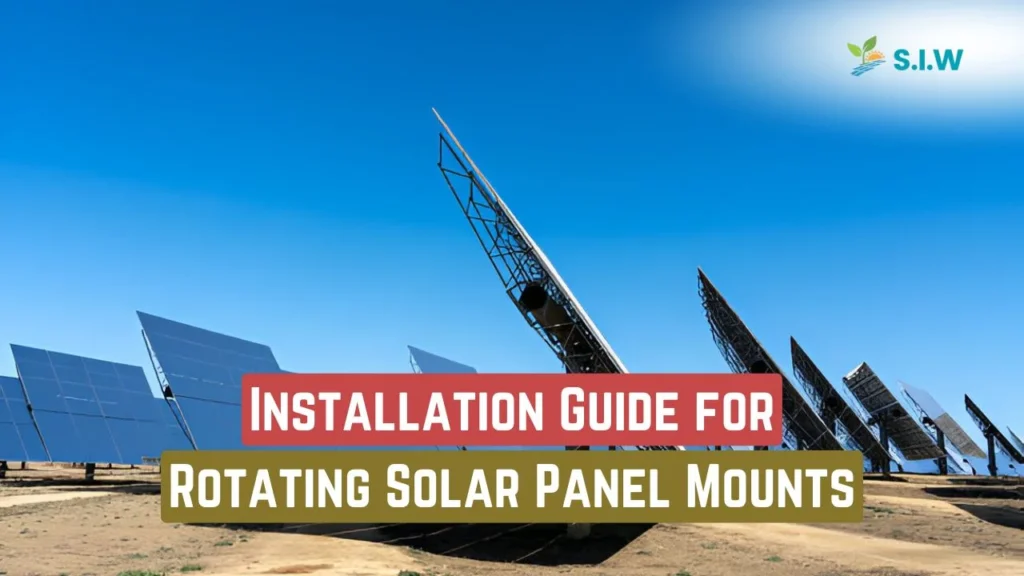
Solar energy is one of the most efficient and sustainable ways to generate electricity, and rotating solar panel mounts are a game-changer in this field. Unlike traditional fixed mounts, rotating solar panel mounts allow your solar panels to follow the sun throughout the day, maximizing energy capture and improving overall system efficiency.
1.1 What Are Rotating Solar Panel Mounts?
Rotating solar panel mounts are specialized frames designed to hold solar panels and rotate them to track the sun’s movement. This dynamic system ensures that the solar panels are always positioned at the optimal angle to capture the most sunlight, regardless of the time of day or season. Whether you’re a homeowner looking to reduce energy costs or a business aiming to lower carbon emissions, rotating solar panel mounts can be a powerful addition to your solar energy system.
1.2 Benefits of Installing Rotating Solar Panels
The primary advantage of rotating mounts is their ability to significantly increase energy production. Studies show that rotating panels can generate up to 30% more electricity than fixed panels. This improvement leads to faster returns on investment and greater overall savings. Additionally, rotating mounts enhance the flexibility of your solar setup by allowing adjustments for seasonal variations in sunlight.
2. Tools and Materials Required
Before starting the installation process, it’s essential to have the right tools and materials on hand. Being prepared will help the project go smoothly and avoid unnecessary delays.
2.1 Essential Tools for Installation
- Drill with appropriate bits
- Wrenches and sockets
- Screwdrivers
- Level
- Tape measure
- Wire strippers
- Ladder (for roof installations)
2.2 Materials Checklist
- Rotating solar panel mount kit
- Solar panels
- Mounting brackets and hardware
- Electrical cables and connectors
- Grounding wire
- Inverter
- Fasteners and bolts
3. Choosing the Right Location
Selecting the optimal location for your solar panels is a crucial step in ensuring maximum energy generation.
3.1 Importance of Location for Maximum Efficiency
For rotating solar panels to perform at their best, they need direct access to sunlight for most of the day. Avoid locations that are shaded by trees, buildings, or other obstacles that can block the sun’s path.
3.2 Assessing Sunlight Exposure Throughout the Year
It’s important to take into account the changing angle of the sun throughout the seasons. A proper solar site analysis will help you determine the best placement and orientation for your rotating panels to ensure consistent energy production year-round.
4. Types of Rotating Solar Panel Mounts
When considering rotating solar panel mounts, it’s important to understand the different types available. Each has its own benefits and may be suited for specific environments or energy goals.
4.1 Manual vs. Automated Mounts
- Manual Mounts: These require periodic adjustment by hand to align the solar panels with the sun. Although less expensive, they demand more attention and regular changes, especially during seasonal shifts.
- Automated Mounts: Automated mounts use motors and sensors to adjust the position of the panels throughout the day. This system is more efficient and requires less maintenance, as it continuously tracks the sun for optimal energy capture.
4.2 Fixed vs. Adjustable Angles
- Fixed-Angle Mounts: Some rotating mounts allow for horizontal rotation but have a fixed vertical tilt. This can be ideal for areas where the sun’s vertical position doesn’t vary much throughout the year.
- Adjustable-Angle Mounts: These mounts can rotate both horizontally and vertically, allowing for fine-tuned adjustments depending on the season, maximizing the solar gain all year round.
5. How Rotating Mounts Maximize Solar Efficiency
Rotating solar panel mounts ensure that your system captures the maximum amount of sunlight by following the sun’s path.
5.1 How Rotation Affects Sunlight Capture
Unlike static panels that only receive optimal sunlight for a few hours a day, rotating mounts align your solar panels with the sun’s movement, increasing energy capture throughout the day. This is particularly useful in areas where sunlight hours fluctuate between seasons.
5.2 Energy Production Comparisons Between Fixed and Rotating Systems
Studies show that rotating solar panel mounts can boost energy production by 25-30% compared to fixed systems. This increase in efficiency can lead to faster return on investment (ROI) and significant energy cost savings over the life of the solar system.
6. Step-by-Step Installation Process
Here’s a detailed walkthrough of the process for installing rotating solar panel mounts.
6.1 Preparing the Ground or Roof Surface
- Ground Installations: Ensure the area is level, clear of debris, and capable of supporting the weight of the mount and solar panels.
- Roof Installations: Ensure the roof is structurally sound, and check local building codes for any height restrictions. Use protective measures to prevent damage to the roof.
6.2 Mount Assembly
Follow the manufacturer’s instructions to assemble the rotating mount. This typically involves connecting the base, the rotating mechanism, and the panel-holding frame. Ensure that all fasteners are securely tightened.
6.3 Securing Solar Panels to the Mount
Once the mount is in place, attach the solar panels securely using the mounting brackets provided in your kit. Be sure that the panels are level and aligned correctly to avoid any imbalance that could disrupt rotation.
7. Electrical Wiring Setup
Electrical wiring is a critical aspect of the solar panel installation. It’s essential to ensure proper connectivity and safety.
7.1 Connecting the Panels to the Electrical System
After securing the panels, connect the positive and negative wires from the solar panels to the inverter. Use appropriate connectors and ensure that all wiring is properly insulated to prevent electrical shorts.
7.2 Ensuring Proper Grounding
Grounding is essential for safety and to protect your system from power surges. Connect the ground wire from the panels and mount to a dedicated grounding point. This helps prevent electrical faults and reduces the risk of fire.
8. Calibrating the Rotation Mechanism
After installation, you’ll need to calibrate the rotation mechanism to ensure it tracks the sun correctly.
8.1 How to Program Automated Rotating Systems
Most automated rotating systems come with a control panel that allows you to set the parameters for rotation. You’ll typically input your geographic location, and the system will automatically adjust the solar panels to track the sun based on the time of year.
8.2 Manual Calibration for Seasonal Adjustments
For manual systems, you’ll need to adjust the panel tilt and rotation manually every few months. Adjust the angle based on the sun’s position in your region to optimize energy production during different seasons.
9. Maintenance and Upkeep of Rotating Solar Panels
Like any solar setup, rotating solar panel mounts require regular maintenance to ensure optimal performance.
9.1 Regular Cleaning of Solar Panels
Dust, dirt, and debris can accumulate on solar panels, reducing their efficiency. It’s recommended to clean the solar panels at least twice a year, or more frequently in dusty environments.
9.2 Inspecting and Adjusting the Mount’s Rotation System
Regularly check the mount’s mechanical parts for wear and tear. Lubricate moving parts as necessary and ensure that the rotation mechanism remains smooth and free of obstructions.
10. Safety Considerations During Installation
Safety should always be a priority during solar panel installation.
10.1 Electrical Safety Guidelines
Always ensure that the electrical system is disconnected while working on the panels or wiring. Use insulated tools and wear protective gear to minimize the risk of electric shock.
10.2 Handling Sharp Edges and Heavy Equipment
Solar panels and mounting systems can be heavy and may have sharp edges. Always wear gloves and use proper lifting techniques to avoid injury.
11. Common Installation Mistakes to Avoid
Many installation errors can be easily avoided with proper planning and attention to detail.
11.1 Incorrect Mount Positioning
One of the most common mistakes is positioning the mount in a location that receives limited sunlight. Conduct a thorough site analysis to ensure optimal placement.
11.2 Neglecting Proper Wiring and Grounding
Improper wiring or grounding can lead to system failure or pose safety risks. Always double-check connections and ensure that all components are properly grounded.
12. Environmental Impact of Rotating Solar Panels
Rotating solar panels not only increase efficiency but also contribute positively to the environment.
12.1 Contribution to Green Energy
By capturing more sunlight, rotating solar panels allow for greater energy production, reducing reliance on fossil fuels and promoting renewable energy.
12.2 Reducing Carbon Footprint
Each kilowatt of solar energy generated reduces greenhouse gas emissions. Installing rotating solar panels enhances this impact, allowing you to reduce your carbon footprint even further.
13. Cost of Installing Rotating Solar Mounts
Understanding the cost is crucial for planning your solar energy system.
13.1 Initial Investment Costs
Rotating solar panel mounts typically cost more than fixed mounts due to the additional moving parts and automation systems. However, the increase in energy production can make up for this initial investment over time.
13.2 Long-Term Savings and ROI
With the additional energy generated by rotating mounts, most systems pay for themselves within 5 to 10 years, depending on your energy needs and location.
14. Troubleshooting Issues with Rotating Mounts
Occasionally, issues may arise with rotating solar mounts, but many can be easily resolved.
14.1 Mechanical Problems
If the mount’s rotation mechanism becomes stuck, check for debris or mechanical failures in the moving parts. Lubricating the joints or replacing worn-out components may resolve the issue.
14.2 Electrical Failures
If your system isn’t producing electricity, inspect the wiring and connections for any breaks or loose wires. Also, ensure that the inverter and other electrical components are functioning correctly.
Final Thoughts
By following this installation guide for rotating solar panel mounts, you can significantly enhance the efficiency of your solar energy system. Proper installation, maintenance, and understanding of the technology will ensure that your investment pays off both in terms of energy savings and environmental impact.
Frequently Asked Questions
- Can rotating mounts be installed on all types of roofs?
Yes, rotating mounts can be adapted for most roof types, but it’s important to consult with a professional installer for unique roof designs. - How much more efficient are rotating panels compared to fixed ones?
Rotating panels can increase efficiency by up to 30%, depending on location and sunlight exposure. - What is the lifespan of a rotating solar panel mount?
Typically, rotating mounts have a lifespan of 20 to 25 years with proper maintenance. - Is professional installation required?
While DIY installation is possible, professional installation is recommended to ensure optimal performance and safety. - How do you maintain the rotation system?
Regular inspections and cleaning of the panels, along with checking the mechanical components, will ensure the system operates smoothly. - Do rotating mounts work in areas with low sunlight?
Yes, even in areas with lower sunlight, rotating mounts can maximize the energy captured by following the sun’s path more effectively.

