Introduction
With the rise of renewable energy solutions, many homeowners are turning to solar power systems to reduce energy bills and promote sustainability. However, effectively managing solar energy production and consumption can be a challenge without the right tools. This is where a Home Assistant compatible solar charge controller comes into play. Integrating solar power systems with Home Assistant, an open-source platform for home automation, allows users to optimize energy use, track data in real-time, and create customized automations to improve efficiency.
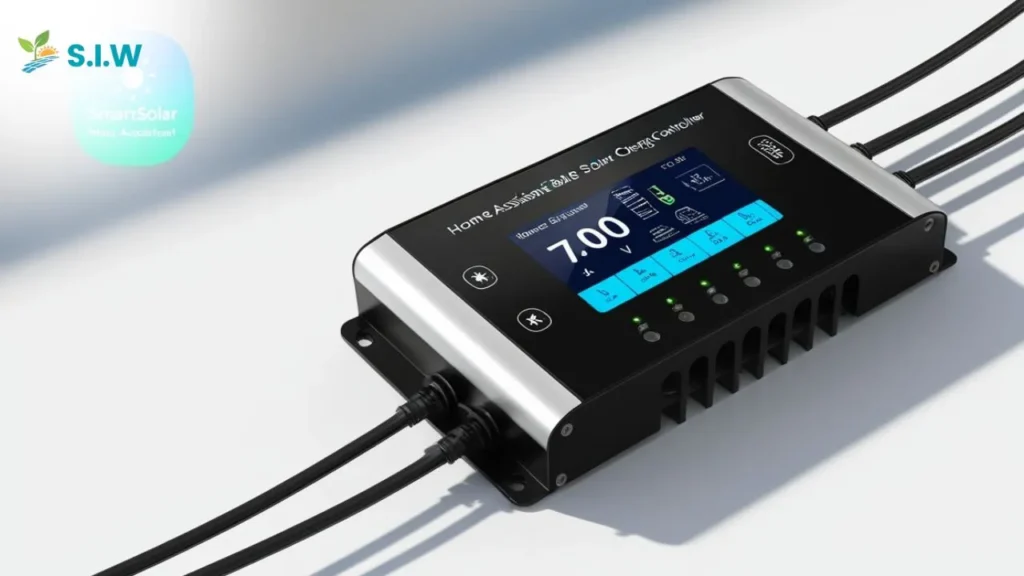
At the heart of any solar power system, the charge controller ensures that your batteries are charged correctly and prevents overcharging or undercharging, both of which can damage the battery. When paired with a smart home automation platform like Home Assistant, the controller’s capabilities are significantly enhanced. This article will dive deep into what a solar charge controller is, how it functions, and how integrating it with Home Assistant can lead to smarter and more efficient solar energy management.
What is a Solar Charge Controller?
A solar charge controller plays a critical role in regulating the power flowing from the solar panels to the solar batteries. It acts as a gatekeeper, ensuring that your batteries receive the appropriate voltage and current, preventing overcharging or excessive discharge. Without this vital device, batteries can be damaged, resulting in reduced performance and longevity.
There are two main types of solar charge controllers: Pulse Width Modulation (PWM) and Maximum Power Point Tracking (MPPT). PWM controllers are simpler and more affordable but offer lower efficiency. MPPT controllers, on the other hand, are designed to maximize the energy harvested from the solar panels by continuously adjusting the electrical input to match the optimal power point. MPPT controllers are especially beneficial in systems where sunlight conditions fluctuate frequently, ensuring that you are always generating the maximum amount of power possible.
In modern solar systems, MPPT charge controllers have become the standard, particularly in setups that are connected to smart home systems like Home Assistant. These controllers can provide real-time data and enable automation that optimizes both power generation and usage, offering a substantial upgrade over more basic PWM systems.
Benefits of Using a Solar Charge Controller
Solar charge controllers provide significant advantages for both your solar power system for home and your overall energy management strategy. Here are the core benefits:
Battery Protection: One of the primary functions of a charge controller is to protect your batteries from being overcharged, which can lead to overheating and damage. It also prevents the batteries from discharging too much, ensuring a longer lifespan for your battery bank.
Increased Efficiency: Especially with MPPT controllers, the efficiency of energy conversion is maximized. These controllers adjust the voltage and current to ensure that the solar panels operate at their peak efficiency, even in varying weather conditions.
Extended System Longevity: By ensuring that both your batteries and solar panels are always operating under optimal conditions, a charge controller can significantly extend the lifespan of your solar power system. This reduces the need for costly replacements and repairs over time.
Automation Potential: When combined with Home Assistant, a solar charge controller can become part of a broader home automation system. For example, you can automate energy consumption by using solar energy during peak production times or automatically turning off non-essential appliances when energy levels are low.
How Does Home Assistant Enhance Solar Charge Controllers?
By integrating a solar charge controller with Home Assistant, you can centralize and automate your solar energy management, creating a more efficient and intelligent home energy system. Here’s how Home Assistant enhances the functionality of your charge controller:
Centralized Monitoring: Home Assistant allows you to monitor all aspects of your solar system from a single interface. This includes real-time data on energy production, battery status, and overall energy consumption. Having all this information in one place makes it easier to manage and optimize your energy system.
Automation Capabilities: One of the biggest advantages of integrating your charge controller with Home Assistant is the ability to create automations based on solar energy production and consumption. For example, if your solar panels are generating excess power, Home Assistant can automatically divert that energy to power high-demand appliances or charge an electric vehicle (EV). Conversely, during periods of low solar generation, you can set Home Assistant to reduce power to non-essential devices, ensuring that your energy is used efficiently.
Integration with Other Smart Devices: Home Assistant enables seamless integration between your solar charge controller and other smart home devices. This opens up the possibility of more complex automation scenarios. For instance, your thermostat could adjust itself based on the availability of solar energy, or your lights could dim automatically when battery levels are low.
Home Assistant Compatible Solar Charge Controller
When choosing a solar charge controller for integration with Home Assistant, it’s essential to select one that is compatible with the platform. Some controllers come with built-in connectivity features like Wi-Fi, Modbus, or MQTT, which makes integration with Home Assistant easier. Others may require additional hardware, such as a Raspberry Pi or specific communication modules, to connect.
Several manufacturers produce charge controllers that are either directly compatible with Home Assistant or can be integrated with minimal effort. Some of the top brands to consider include Victron Energy, Renogy, and EPEver. These companies offer MPPT charge controllers that provide the flexibility and connectivity needed for smart home integration.
Top Home Assistant-Compatible Solar Charge Controllers
When looking for the best charge controllers that integrate with Home Assistant, a few brands stand out due to their features and user-friendly integrations:
Victron Energy MPPT Charge Controllers: Victron Energy is well-known for its high-quality MPPT charge controllers, which are widely regarded as some of the best in the industry. They offer excellent efficiency and come equipped with VE.Direct or VE.Can ports, which can be easily integrated into Home Assistant using either Modbus or MQTT protocols. Their devices also feature robust data monitoring capabilities, providing detailed insights into solar production and battery health.
Renogy Solar Charge Controllers: Renogy is another popular brand that offers MPPT controllers with excellent performance and features. While Renogy devices may not natively support Home Assistant integration out of the box, they can be integrated using a combination of MQTT and other third-party tools. Many Home Assistant users have successfully added Renogy charge controllers to their smart home setups to enable real-time monitoring and automation.
EPEver Solar Charge Controllers: EPEver controllers are budget-friendly yet reliable devices that offer MPPT technology. Like Renogy, they do not come with built-in Home Assistant compatibility but can be integrated with some additional work using Modbus protocols. These charge controllers are ideal for DIY enthusiasts who want to get the most value for their money without compromising on functionality.
Setting Up a Home Assistant-Compatible Solar Charge Controller
Setting up your Home Assistant compatible solar charge controller may seem like a daunting task, but with the right tools and a bit of patience, it can be done seamlessly. Here is a step-by-step guide to help you get started:
- Choose Your Charge Controller: Select a charge controller that supports integration with Home Assistant, such as one from Victron Energy or Renogy. Make sure it has the necessary communication ports, such as VE.Direct, Modbus, or MQTT.
- Install Home Assistant: If you haven’t already, install Home Assistant on your preferred hardware. Home Assistant can run on various platforms, including Raspberry Pi, Docker, or even a dedicated server.
- Connect the Controller: Use the appropriate interface to connect your charge controller to Home Assistant. This may involve setting up a Modbus connection or using MQTT for communication between the controller and the platform.
- Add to Home Assistant: Once the hardware is connected, you’ll need to add the charge controller to your Home Assistant instance. This is typically done by adding an MQTT or Modbus integration within the Home Assistant dashboard, allowing the platform to pull in data from the controller.
- Customize Your Dashboard: After the controller is connected, you can customize the Home Assistant dashboard to display the most important data, such as energy production, battery status, and consumption metrics.
By following these steps, you can successfully set up your solar charge controller within Home Assistant, enabling you to track performance, automate energy use, and optimize your solar power system.
Optimizing Solar Energy Management with Home Assistant
Once your charge controller is integrated with Home Assistant, you can start creating automations and optimizing your solar energy system. One common automation is to schedule high-energy-consuming tasks, such as running a washing machine or charging an electric vehicle, during periods of peak solar production. This reduces the reliance on grid power and maximizes the use of renewable energy.
Additionally, Home Assistant allows you to set thresholds for battery levels. For example, if your battery charge drops below a certain percentage, Home Assistant can automatically reduce the power to non-essential devices, helping to conserve energy until solar production increases.
Advantages of Monitoring Solar Systems with Home Assistant
Monitoring your solar energy system in real-time through Home Assistant offers several key advantages:
Data Visualization: Home Assistant provides a user-friendly interface where you can visualize all aspects of your solar system. This includes real-time energy production, battery status, and consumption patterns. Having this information readily available helps you make informed decisions about energy use.
Historical Tracking: In addition to real-time monitoring, Home Assistant allows you to track historical data. You can analyze past performance to identify trends and optimize your solar energy system accordingly. For example, you can adjust appliance schedules based on when your solar system produces the most energy throughout the year.
Automation and Alerts: By setting up automations and alerts, you can ensure that your solar system operates efficiently without requiring constant manual adjustments. Home Assistant can notify you if there are any issues with your solar charge controller or if your battery levels drop too low.
Creating Automation Rules in Home Assistant for Solar Power
Creating automation rules in Home Assistant allows you to make the most out of your solar energy system. You can automate various tasks based on energy production and consumption levels.
Example Automations:
- Appliance Scheduling: Automatically run energy-intensive appliances like dishwashers, washing machines, and pool pumps during periods of peak solar energy production.
- Energy Conservation: Power down non-essential devices or dim lights when energy production drops or battery levels are low.
- Electric Vehicle Charging: Set up rules to charge your electric vehicle during peak solar hours or when battery levels are above a certain threshold.
By implementing these automations, you ensure that your solar energy is used efficiently, reducing waste and lowering energy costs.
FAQs
What is a Home Assistant compatible solar charge controller?
A Home Assistant compatible solar charge controller is a device that regulates the voltage and current from solar panels to batteries while integrating with the Home Assistant platform for automation and monitoring.
How does Home Assistant improve solar energy management?
Home Assistant centralizes monitoring, provides automation capabilities, and integrates solar charge controllers with other smart home devices, allowing for more efficient energy use.
Can I automate energy use with Home Assistant and a solar charge controller?
Yes, Home Assistant allows you to automate tasks like running appliances or charging devices based on solar energy production and battery levels.
Which solar charge controllers are compatible with Home Assistant?
Popular choices include Victron Energy MPPT controllers, Renogy charge controllers, and EPEver MPPT controllers, many of which can be integrated using Modbus or MQTT.
How do I connect a solar charge controller to Home Assistant?
You can connect a solar charge controller to Home Assistant via communication protocols like MQTT or Modbus. The specific method depends on the charge controller model.
What are the benefits of using MPPT charge controllers?
MPPT charge controllers maximize the efficiency of your solar system by continuously adjusting to the optimal power point, ensuring that you generate the maximum amount of energy from your panels.
Conclusion
Integrating a Home Assistant compatible solar charge controller into your smart home setup offers numerous benefits, from real-time monitoring and automation to energy optimization. By harnessing the power of Home Assistant, you can take full control of your solar energy system, maximizing efficiency, reducing costs, and promoting sustainability. Whether you’re using Victron Energy, Renogy, or another leading brand, adding smart home automation to your solar setup is a step toward a more intelligent and eco-friendly home.

