In recent years, solar energy has become an excellent solution for powering RVs, offering independence from the grid while lowering energy costs. Charging an RV air conditioner can be energy-intensive, but with the right setup, solar panels make it possible to cool your RV efficiently, even off the beaten path. In this article, we will provide a step-by-step guide to using solar energy to power and charge your RV’s air conditioning system effectively.
Understanding RV Air Conditioner Power Needs
Before installing a solar setup, you need to determine the power consumption of your RV’s air conditioner. Most RV air conditioners typically require between 1,500 to 3,500 watts of electricity. The startup or surge power can be significantly higher, so you must account for this in your solar setup. Knowing your AC unit’s power consumption helps you design the right solar array and battery storage to sustain cooling for long periods.
Components Required to Power an RV Air Conditioner with Solar
To successfully charge and run an RV air conditioner using solar energy, the following components are essential:
- Solar Panels: Generate electricity from sunlight.
- Inverter: Converts DC power from solar panels to AC power required by the air conditioner.
- Charge Controller: Regulates the energy flow from panels to the battery.
- Battery Bank: Stores energy for night-time or cloudy day use.
- Wiring and Fuses: Ensure the system is safely interconnected.
Calculating Solar Panel Requirements for RV AC Systems
If your air conditioner consumes 2,000 watts per hour, and you plan to run it for 4 hours daily, you will need at least 8,000 watt-hours (Wh) of power. Assuming 6 peak sun hours per day, your system should generate around 1,333 watts per hour from the panels. With standard 300W solar panels, you would need at least 5 panels (1,500W in total).
For increased autonomy, consider oversizing the solar array to account for cloudy days or reduced efficiency. Installing 7-8 solar panels ensures you have a surplus to keep the batteries fully charged.
Choosing the Right Batteries for Air Conditioner Use
Since air conditioners are power-hungry, choosing high-capacity batteries is essential. Lithium-ion batteries are ideal for RVs because they offer:
- Longer lifespan than lead-acid batteries
- Faster charging and deeper discharge rates
- Lower weight and better energy efficiency
For example, if your air conditioner requires 8,000Wh daily, a 10kWh battery bank would give you enough power for both AC operation and other essential appliances.
Using an Inverter to Run the Air Conditioner
An air conditioner runs on AC power, but solar systems generate DC power. Therefore, you need a pure sine wave inverter to convert DC to AC efficiently. The inverter size must match or exceed the air conditioner’s starting wattage. If your AC unit has a startup surge of 3,500 watts, choose an inverter rated for at least 4,000 watts.
Installation Process: Step-by-Step Guide
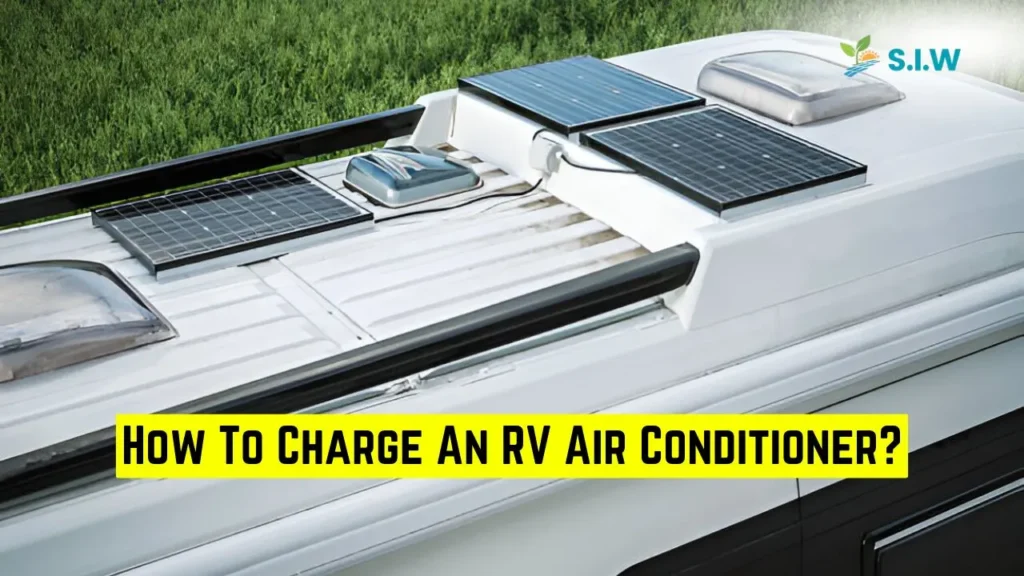
- Mount the Solar Panels: Install solar panels on the roof of your RV using adjustable mounting brackets to capture maximum sunlight.
- Install the Charge Controller: Connect the panels to the charge controller to regulate battery charging and prevent overcharging.
- Set Up the Battery Bank: Wire multiple batteries in series or parallel to meet your voltage and storage needs.
- Connect the Inverter: Link the inverter to the battery bank and ensure it can handle the AC unit’s surge power.
- Wiring and Testing: Use appropriate fuses and cables to connect everything. Test the system to ensure proper operation.
Tips for Efficient Solar AC Use in Your RV
- Cool the RV early in the day to reduce heat buildup. Running the AC during peak sun hours ensures the solar panels meet energy demands directly.
- Use insulation and reflective shades to minimize heat infiltration. This reduces the strain on the air conditioner.
- Consider soft start kits for your AC unit. These reduce the startup surge, making it easier to run on solar power.
- Monitor battery levels regularly to avoid over-discharging, which can shorten the lifespan of your batteries.
Cost Considerations for Solar-Powered RV Air Conditioning
Setting up a solar system to charge your RV air conditioner involves an initial investment, but the long-term savings and independence make it worthwhile. Here’s a breakdown of potential costs:
- Solar Panels (6 x 300W): $2,500 – $3,000
- Charge Controller: $200 – $500
- Lithium Batteries (10kWh): $5,000 – $8,000
- Inverter (4,000W): $1,000 – $2,000
- Installation and Accessories: $1,500 – $2,500
Total estimated cost: $10,000 – $16,000.
While it may seem high, this investment allows you to travel off-grid comfortably without relying on shore power or noisy generators.
Maintenance and Troubleshooting Tips
- Clean your solar panels regularly to maximize efficiency. Dirt and debris can block sunlight and reduce power output.
- Check battery health monthly to ensure optimal performance.
- Inspect wiring connections and fuses for signs of wear or corrosion.
- Monitor inverter output to confirm it matches the air conditioner’s requirements.
Stay Cool Off-Grid with Solar Energy
Using solar power to charge an RV air conditioner offers a sustainable and convenient way to stay cool during your travels. With the right solar setup, including panels, batteries, and inverters, you can enjoy the freedom of off-grid camping without sacrificing comfort. Proper installation and regular maintenance ensure your system runs efficiently, helping you make the most of your solar investment.

