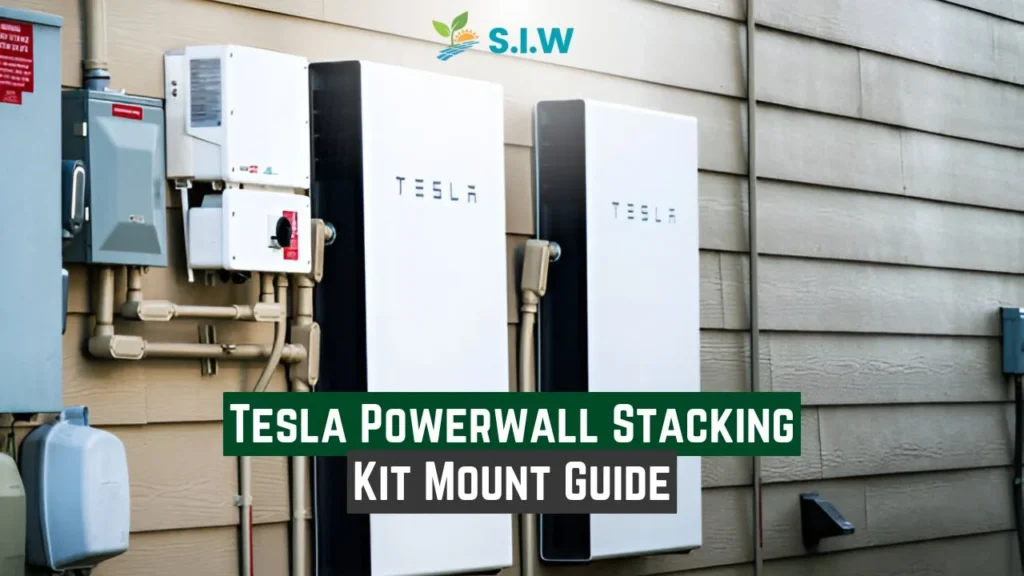
The Tesla Powerwall has revolutionized home energy storage by offering a sleek, compact, and efficient solution for homeowners looking to harness renewable energy. For those expanding their energy capacity, the Tesla Powerwall Stacking Kit allows for the installation of multiple Powerwalls in a safe, secure, and aesthetically pleasing manner. This guide walks you through the process of mounting the Tesla Powerwall Stacking Kit, ensuring a flawless setup and optimal performance.
Understanding the Tesla Powerwall Stacking Kit
Tesla’s Powerwall Stacking Kit is designed for users who want to scale up their energy storage system by stacking multiple Powerwalls. Whether you’re looking to ensure continuous power during outages, reduce your reliance on the grid, or maximize the energy from your solar panels, this kit simplifies the process of installing multiple units.
This guide will cover everything from necessary tools, installation requirements, and safety precautions to detailed steps for mounting and securing the Powerwalls in a stacked configuration. Proper installation ensures your system operates efficiently and safely for years to come.
Tools and Materials Needed for Installation
Before diving into the actual installation, ensure you have the following tools and materials ready:
- Tesla Powerwall Stacking Kit (including mounting hardware)
- Power drill
- Wall anchors (depending on wall type)
- Level
- Measuring tape
- Wrenches (specific sizes as per Tesla’s installation manual)
- Personal protective equipment (gloves, safety goggles)
- Torque wrench (for proper bolt tightening)
Ensuring all the tools are in place will save you time during the installation and prevent unnecessary delays.
Preparing for Tesla Powerwall Stacking Kit Installation
Choose the Right Location
The location for your Tesla Powerwall is crucial for both performance and safety. Choose a spot that:
- Is accessible but out of the way to prevent accidental damage
- Meets Tesla’s recommended environmental requirements, including temperature and ventilation
- Avoids direct sunlight or moisture-prone areas, as these can reduce efficiency or cause wear over time
Check Wall Load-Bearing Capacity
Powerwalls are heavy, and when stacking multiple units, the wall or mounting surface must support the combined weight. Ensure that your wall can bear the load, which may involve consulting with a structural engineer if you’re unsure. Brick, concrete, or reinforced walls are typically ideal.
How to Install the Tesla Powerwall Stacking Kit
Step 1: Mark the Mounting Points
Once you’ve selected a suitable location, mark the spots where you’ll secure the wall brackets. Use a level to ensure that the brackets are perfectly horizontal, as misalignment can affect the overall stability of the installation. Make sure to double-check the measurements based on Tesla’s specifications.
Step 2: Install the Wall Brackets
Using a power drill, mount the wall brackets securely to the marked locations. Ensure that the brackets are firmly anchored, especially if you’re installing the kit on drywall or weaker surfaces. Wall anchors may be necessary to increase stability. Always follow Tesla’s guidelines for proper bracket spacing and bolt placement.
Step 3: Mount the First Powerwall
With the wall brackets securely installed, it’s time to mount the first Powerwall unit. This step may require assistance due to the unit’s weight. Align the Powerwall with the brackets and carefully secure it using the provided bolts. Be sure to use a torque wrench to tighten the bolts to the specified torque setting. Over-tightening can damage the unit or mounting system, while under-tightening can compromise stability.
Step 4: Attach the Stacking Kit Components
Once the first Powerwall is in place, it’s time to attach the stacking kit’s components. This involves adding the interconnecting brackets that will hold the second Powerwall securely on top of the first one. Ensure that each bracket is firmly secured with bolts, following Tesla’s recommended settings for bolt torque.
Stacking Additional Powerwalls
Step 5: Align and Mount the Second Powerwall
After the first Powerwall is secure and the stacking kit components are attached, you can now align and mount the second Powerwall on top of the first. Like the first unit, this may require assistance. Carefully position the second unit and secure it using the stacking kit’s bolts and brackets.
Step 6: Ensure Proper Wiring
One of the most critical aspects of stacking multiple Powerwalls is ensuring that the wiring between units is correctly connected. Tesla’s Powerwalls are designed for seamless integration, but following the manual closely during the wiring process is essential. Incorrect wiring can lead to performance issues or even safety hazards.
Safety Tips for Tesla Powerwall Stacking Kit Installation
Wear Proper Protective Gear
Given the weight of the Powerwall units and the use of power tools, wearing proper safety gear is vital. Safety goggles, gloves, and closed-toe shoes are recommended.
Follow Tesla’s Installation Guidelines Closely
Tesla provides a detailed installation manual for the Powerwall and the Stacking Kit. Deviating from these instructions can void your warranty or result in an unsafe installation.
Have a Certified Electrician Assist
While the physical installation can be handled by anyone with the right tools and skills, it’s strongly recommended to have a certified electrician handle the wiring to ensure everything is done to code and operates safely.
Benefits of Using the Tesla Powerwall Stacking Kit
Expand Energy Storage Capacity
One of the key advantages of using the Tesla Powerwall Stacking Kit is the ability to increase your home’s energy storage capacity. By stacking multiple Powerwalls, you can store more energy from your solar panels or from the grid during off-peak hours.
Improved Aesthetics and Space Efficiency
The stacking kit allows for a clean, streamlined installation that looks more professional and takes up less space compared to installing multiple units side by side.
Enhanced System Efficiency
By stacking Powerwalls, you not only improve space efficiency but also ensure that the system operates as a cohesive unit. This results in smoother energy distribution and management across your home or business.
FAQs
What is the maximum number of Powerwalls I can stack using the Tesla Powerwall Stacking Kit?
You can stack up to 10 Powerwalls using the Tesla Powerwall Stacking Kit. However, you should always consult the latest installation guide or Tesla support for specifics.
Can I install the Tesla Powerwall Stacking Kit myself, or should I hire a professional?
While the installation of the physical kit is possible for experienced DIYers, it’s highly recommended to hire a certified professional for the wiring and electrical setup.
Does the Tesla Powerwall Stacking Kit work with all versions of the Powerwall?
The stacking kit is compatible with Powerwall 2 and later versions. Always check for compatibility with your specific Powerwall model.
Is it safe to install Tesla Powerwalls outdoors?
Yes, Tesla Powerwalls are rated for outdoor installation, but they should be installed in a sheltered location to protect against direct sunlight and moisture.
What are the benefits of stacking multiple Powerwalls?
Stacking multiple Powerwalls increases your energy storage capacity, allowing you to store more power from renewable sources or during off-peak times. It also optimizes energy management across your property.
Do I need special permits to install multiple Powerwalls?
Permit requirements vary by location, but many areas will require electrical permits, especially if you’re connecting the Powerwalls to your home’s grid. Check with local authorities for specific requirements.


