Switching to solar energy is one of the smartest investments you can make for your home or business. Not only does it reduce your carbon footprint, but it can also save you a considerable amount on your energy bills over time. Understanding the intricate process of installing solar panels is key to a successful transition to renewable energy. This detailed solar panel installation diagram guide will walk you through every component, from selecting the right equipment to wiring your system correctly.
Understanding the Basics of Solar Panel Installation
Before diving into the technical aspects of installation, it’s essential to understand how solar panels work and the various components that are involved in a typical system. Solar panels convert sunlight into electricity using photovoltaic (PV) cells. These cells generate direct current (DC) power, which is then converted into alternating current (AC) power by an inverter, making it suitable for home or business use.
Solar panel systems consist of the following main components:
- Solar Panels (PV Modules): Capture sunlight and convert it to DC power.
- Inverter: Converts DC power to usable AC power.
- Mounting System: Secures the panels to your roof or ground.
- Wiring: Connects the entire system.
- Charge Controller (Optional): Regulates the power output.
- Batteries (Optional): Store excess power for later use.
- Disconnect Switch: Provides a safety measure to cut off power.
Each of these components plays a crucial role in ensuring the efficiency and safety of your solar power system.
Choosing the Right Location for Solar Panels
When installing solar panels, the location is one of the most critical factors. To maximize energy generation, panels should be installed where they receive the most direct sunlight. Ideally, this would be a south-facing roof or ground space with minimal shading throughout the day. Roof tilt, the angle of the panels, and local weather patterns should all be taken into account during installation planning.
To optimize energy efficiency:
- Choose a location with at least six hours of direct sunlight per day.
- Ensure there are no obstacles like trees, buildings, or chimneys blocking the sun.
- Consider the local climate—solar panels work best in sunny environments, but even in cloudy areas, they can generate substantial electricity.
Essential Tools and Equipment for Solar Panel Installation
A successful solar installation relies on having the right tools and equipment. Here’s a list of essential items you will need:
- Drill and Drill Bits: For attaching the mounting system.
- Wrenches and Screwdrivers: To secure bolts and electrical connections.
- Wire Cutters/Strippers: For preparing wiring connections.
- Multimeter: To test electrical connections and check voltage output.
- Safety Harness: If installing panels on a roof.
- Mounting Brackets and Rails: To secure panels to your roof or ground.
- Grounding Equipment: For safety and protection from electrical faults.
Having the correct tools on hand will ensure a smooth and safe installation process.
Solar Panel Installation Diagram Explained
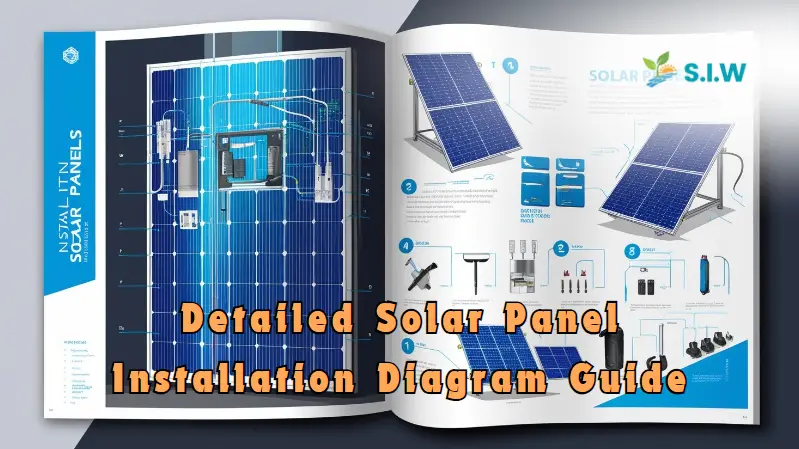
The solar panel installation diagram is a vital blueprint that outlines the connection between the various components of a solar power system. Below is an explanation of how a typical solar panel installation diagram looks:
- Solar Panels (PV Modules)
These are mounted on your roof or ground, where they receive sunlight and convert it into DC electricity. Multiple panels are wired together to form a solar array. - Inverter
The DC electricity generated by the panels is routed to the inverter. The inverter then converts the DC electricity into AC electricity, which can be used to power your home or be fed into the electrical grid. - Electrical Panel
The AC electricity produced by the inverter flows into your electrical panel, where it is distributed to power your home. Excess electricity can be routed to a battery storage system (if available) or sent back to the grid. - Charge Controller (Optional)
If you have a battery system, a solar charge controller is used to regulate the voltage and current from the solar panels to prevent overcharging the batteries. - Batteries (Optional)
For off-grid or hybrid systems, batteries store excess power generated during the day for use at night or during cloudy periods. - Disconnect Switch
This switch is an important safety feature, allowing you to disconnect your solar panel system from the electrical grid or your home’s electrical system during maintenance or emergencies. - Grounding System
Proper grounding ensures that the entire system is safe and protects against electric shocks or lightning strikes.
Step-by-Step Solar Panel Installation Process
Now that you have a basic understanding of the components involved, let’s walk through the step-by-step process of installing solar panels.
Step 1: Site Survey and Planning
Begin by conducting a thorough site survey. This includes analyzing your roof’s condition, tilt, and orientation to determine the best location for the panels. Ensure that the area receives ample sunlight and is free from obstructions.
Step 2: Mounting the Solar Panels
Install the mounting system on the roof or ground, depending on your setup. The solar mounting system typically consists of brackets and rails that hold the panels securely in place. Ensure that the mounting system is sturdy and well-secured to prevent any issues during harsh weather conditions.
Step 3: Installing the Panels
Carefully attach the solar panels to the mounting system. Make sure each panel is properly aligned to optimize sunlight exposure. Tighten all the bolts and screws securely.
Step 4: Wiring the System
Connect the solar panels using the correct wiring configuration (series or parallel, depending on the voltage and current requirements). Use appropriate wire gauges and ensure all connections are properly insulated and weatherproofed.
Step 5: Installing the Inverter
Mount the inverter near your main electrical panel. The inverter should be easily accessible for maintenance and monitoring. Connect the DC wiring from the panels to the inverter, then connect the inverter to the AC electrical panel.
Step 6: Grounding the System
Install grounding rods and connect the grounding system to the solar panel array, inverter, and electrical panel. This is crucial for safety and protection from electrical faults.
Step 7: Connecting to the Grid or Battery Storage
If you’re installing a grid-tied system, connect the inverter to your home’s electrical panel and ensure the necessary permits and inspections are completed. For off-grid systems, connect the inverter to your battery storage system and configure the charge controller.
Step 8: Testing and Commissioning
After installation, thoroughly test the entire system. Use a multimeter to check the voltage output and ensure the system is functioning correctly. Make sure the inverter is converting the power properly and that any battery system is charging correctly.
Common Mistakes to Avoid During Solar Panel Installation
Even with a detailed guide, mistakes can happen. Here are some common errors to avoid during the installation process:
- Incorrect Panel Orientation: Make sure the panels are facing the correct direction to maximize sunlight exposure.
- Insufficient Wiring: Using the wrong wire gauge or improperly connecting the wires can lead to system inefficiencies or even dangerous short circuits.
- Poor Grounding: Always ensure the system is properly grounded to prevent electrical faults and protect against lightning.
- Skipping Permits and Inspections: Many regions require permits and inspections for solar installations, especially if you are connecting to the electrical grid. Failing to comply with local regulations can result in fines or system shutdowns.
Maximizing Efficiency in Your Solar Power System
Once your solar panels are installed, there are several ways to ensure that they operate at peak efficiency. Regular maintenance, such as cleaning the panels to remove dust and debris, is essential. Additionally, monitoring systems can help track energy production and quickly identify any issues.
Consider the following tips to optimize efficiency:
- Clean Panels Regularly: Dust, dirt, and leaves can reduce the amount of sunlight that reaches the panels.
- Monitor Energy Production: Use monitoring software to keep track of energy production and identify dips in performance.
- Trim Surrounding Trees: Ensure trees or other obstacles do not block sunlight as they grow over time.
FAQs
How long does it take to install solar panels?
Installation times vary based on the system’s size, but typically it takes 1 to 3 days for residential systems.
Do I need a permit to install solar panels?
Yes, in most areas, you will need permits from your local government to install a solar power system. Always check with local authorities before starting the installation.
Can I install solar panels myself?
While it’s possible to install solar panels yourself, it’s recommended to hire professionals due to the complexity of electrical work and safety considerations.
What is the lifespan of solar panels?
Solar panels typically last 25 to 30 years, with performance degrading slightly over time.
Do solar panels work on cloudy days?
Yes, solar panels can still generate electricity on cloudy days, although the output will be lower compared to sunny days.
How much does solar panel installation cost?
Costs vary based on the system size and location, but the average cost for residential solar installation is between $15,000 and $25,000 before incentives.
Conclusion
Installing solar panels is an excellent investment for anyone looking to reduce their environmental impact and save on energy costs. While the process can seem complicated, following this detailed solar panel installation diagram guide will ensure that your system is installed safely and efficiently. Always consider consulting with professionals if you’re unsure about any part of the installation to ensure the longevity and safety of your solar power system.