As the world moves toward sustainable energy, solar power is at the forefront of this green revolution. For anyone considering installing solar panels on their home or business, preparing solar panels is a critical step to ensure their optimal efficiency and longevity. In this guide, we will take you through the step-by-step process of preparing solar panels for installation and ongoing maintenance.
Understanding Solar Panels
Solar panels, also known as photovoltaic (PV) panels, convert sunlight into electricity. The energy generated can be used for various purposes, from powering household appliances to supplementing electricity for industrial operations. Preparing solar panels involves several key steps, including selecting the right type of panel, ensuring site readiness, and performing necessary maintenance checks.
Types of Solar Panels
Before we dive into the preparation process, it’s important to choose the right solar panel. There are three main types of solar panels:
- Monocrystalline Solar Panels – Known for their high efficiency and sleek appearance, these panels are ideal for areas with limited space.
- Polycrystalline Solar Panels – Slightly less efficient but more cost-effective, these are a popular choice for larger installations.
- Thin-Film Solar Panels – Lightweight and flexible, they are easier to install but tend to be less efficient compared to crystalline panels.
Choosing the Best Location for Solar Panels
Selecting the right site for your solar panels is the first critical step in preparation. The ideal location for solar panels is where they will receive maximum sunlight exposure throughout the day. This typically means installing panels on a south-facing roof in the Northern Hemisphere or a north-facing roof in the Southern Hemisphere. The pitch of the roof also affects energy generation, with an angle between 15 to 40 degrees being optimal for most locations.
Steps to Prepare Solar Panels for Installation
1. Conduct a Site Assessment
Before installation, a thorough site assessment is essential. This assessment includes evaluating the roof or land where the panels will be mounted. Factors to consider include:
- Shading: Ensure there are no trees, buildings, or other obstructions that could cast shadows over the panels.
- Roof Condition: If installing on a roof, check that it’s in good condition and can support the weight of the solar panel system.
- Roof Size: The available area will determine how many panels can be installed, affecting the total energy output.
During this step, it is also important to analyze the angle of the sun at different times of the year to optimize energy absorption.
2. Clean the Installation Site
Before setting up solar panels, it’s crucial to clean the area where they will be installed. Dirt, debris, or grime can impact the panels’ ability to generate energy efficiently. Ensure that the roof or ground is free from dust, leaves, and other obstructions that could cause energy loss or physical damage to the panels.
3. Check Electrical System Compatibility
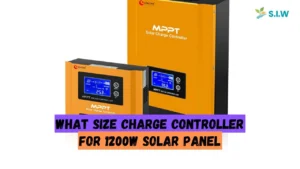
The next step in preparing solar panels is ensuring that your home or business’s electrical system is compatible with solar energy. You may need to upgrade the circuit breaker panel or install a new inverter to convert the solar energy into usable electricity. Consult a professional electrician to evaluate your current system and make any necessary adjustments.
4. Set Up Mounting Hardware
Once the site is prepped, the next step is installing the mounting hardware. Mounting systems secure the solar panels to the roof or ground and allow for adjustments to optimize solar exposure. The mounting hardware needs to be:
- Weather-resistant: Capable of withstanding harsh conditions, such as high winds and heavy rain.
- Properly angled: The correct angle is crucial for maximizing energy production based on your geographical location.
5. Install Solar Panels
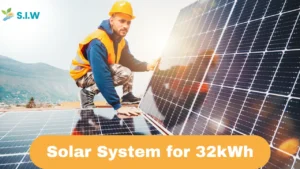
With the mounting system in place, it’s time to install the solar panels. Carefully follow the manufacturer’s instructions for positioning and securing the panels. Proper alignment is essential for efficiency, so make sure the panels are aligned with the sun’s path and the roof or ground structure.
6. Connect Electrical Wiring
After mounting the panels, the next step is to connect the electrical wiring. This process involves linking the panels to an inverter, which converts the DC (direct current) electricity produced by the panels into AC (alternating current) electricity that can be used in homes and businesses. Ensure that all wiring is properly insulated and connected to prevent energy loss or potential hazards.
7. Test the System
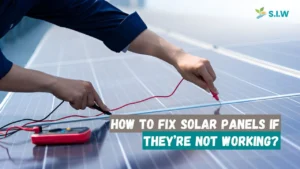
Once the wiring is complete, it’s important to test the entire system to ensure everything is working correctly. Perform a comprehensive check of the inverter, wiring connections, and the panels themselves. If the panels are not producing the expected amount of electricity, troubleshoot to identify the problem, whether it’s a wiring issue, shading, or panel misalignment.
Maintenance Tips for Solar Panels
Proper maintenance is key to maximizing the efficiency and lifespan of your solar panel system. Below are a few maintenance tips to keep your solar panels in top condition:
1. Regular Cleaning
Dust, dirt, and debris can accumulate on solar panels over time, reducing their efficiency. It’s important to clean the solar panels regularly, particularly in dry and dusty climates. Use a soft cloth and water to remove grime without damaging the panel surface. Avoid using abrasive materials or chemicals that could scratch the surface of the panels.
2. Check for Shading
As trees and other objects grow or change over time, new shading issues could arise that affect the amount of sunlight reaching your panels. Periodically check for any shading obstructions and trim back vegetation as needed.
3. Inspect Wiring and Connections
Loose or damaged wiring can lead to energy loss or even pose a fire hazard. Regularly inspect all electrical components to ensure they are in good condition and make any necessary repairs promptly.
4. Monitor Energy Production
Most solar panel systems come with monitoring software that tracks energy production. Use this tool to keep an eye on the system’s performance. If you notice a drop in energy output, it may be time to clean the panels or inspect for other issues like damage or improper alignment.
Why Proper Solar Panel Preparation is Crucial
Thorough preparation of your solar panels is vital to their success in generating clean, renewable energy. By carefully assessing the site, ensuring electrical compatibility, and following the correct installation and maintenance procedures, you will maximize the efficiency of your solar panel system. This not only reduces your energy bills but also contributes to a more sustainable future.


