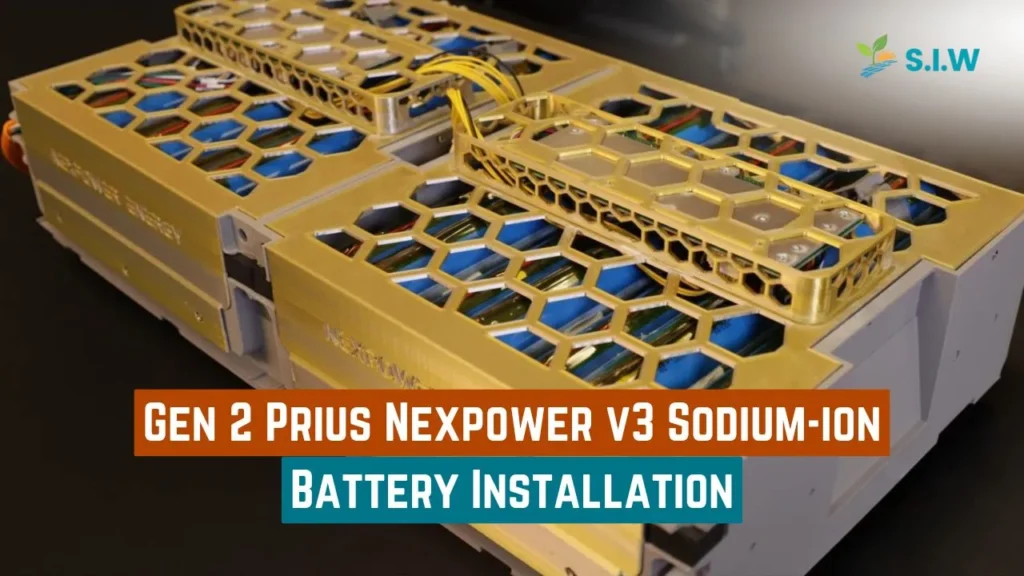
The Toyota Prius Gen 2 is known for reliability and efficiency, but over time, many owners seek battery replacements to maintain optimal performance. As sodium-ion batteries emerge as a cost-effective and environmentally friendly alternative, the NexPower V3 sodium-ion battery offers a compelling upgrade for second-generation Prius models. This comprehensive guide will walk you through the installation process of NexPower V3 sodium-ion batteries for the Gen 2 Prius, covering tools, steps, and important precautions to ensure smooth and safe installation.
Why Upgrade to NexPower V3 Sodium-Ion Batteries for Your Prius?
The NexPower V3 sodium-ion battery is gaining attention as a better alternative to traditional lithium-ion or NiMH batteries. Here are some key benefits:
- Environmental Impact: Sodium is more abundant and sustainable compared to lithium, making sodium-ion batteries eco-friendly.
- Lower Cost: Compared to lithium-ion counterparts, sodium-ion batteries are less expensive to produce.
- Thermal Stability: Sodium-ion batteries perform better under high temperatures, reducing the risk of overheating.
- Longer Cycle Life: With enhanced charge cycles, NexPower V3 ensures longer battery life, making it ideal for long-term use in hybrid vehicles like the Prius.
Tools Required for NexPower V3 Installation in Gen 2 Prius
To complete the installation safely and efficiently, gather the following tools:
- 10mm and 12mm wrenches
- Socket set with extensions
- Insulated gloves
- Torque wrench
- Battery terminal puller
- Electrical tape and heat shrink tubing
- Safety goggles
- Multimeter for voltage checks
Having all tools on hand will make the process easier and reduce the time spent during installation.
Step-by-Step NexPower V3 Battery Installation Process
Step 1: Prepare the Vehicle for Installation
- Turn off the ignition and remove the key from the vehicle.
- Disconnect the 12V auxiliary battery to ensure no electrical currents flow through the system during installation.
- Wear insulated gloves and safety goggles for personal protection.
Step 2: Access the Hybrid Battery Compartment
- Open the rear trunk compartment of your Prius.
- Remove the cargo floor panel and the storage trays to access the hybrid battery pack.
- Disconnect the orange service plug to disable the high-voltage system. This is crucial to avoid electric shock.
Step 3: Remove the Old Battery Pack
- Use a socket wrench to unbolt the battery bracket and supporting components.
- Carefully disconnect the battery terminals and wiring harness connected to the battery.
- Remove the old battery pack and place it on a non-conductive surface for proper disposal.
Step 4: Install the NexPower V3 Sodium-Ion Battery
- Place the NexPower V3 battery pack into the same compartment, ensuring a secure fit.
- Reconnect the wiring harness and battery terminals tightly. Use the torque wrench to secure the connections to manufacturer-specified torque.
- Wrap exposed wiring with electrical tape or heat shrink tubing for safety.
Step 5: Test the Installation
- Use a multimeter to check the voltage of the newly installed NexPower V3 battery. Ensure it aligns with recommended voltage ranges.
- Reconnect the orange service plug to reactivate the high-voltage system.
- Reinstall the cargo floor panel and storage trays.
Step 6: Final Setup and Test Drive
- Reconnect the 12V auxiliary battery and start the vehicle to ensure everything is functioning properly.
- Look for error codes or warning lights on the dashboard; if any appear, recheck your connections.
- Take your Prius for a short test drive to confirm the smooth operation of the new battery system.
Common Issues During Installation and How to Troubleshoot Them
- Battery Not Recognized by the System:
- Double-check the battery terminals and wiring connections.
- Ensure the orange service plug is fully inserted.
- Error Codes on the Dashboard:
- Verify the voltage with a multimeter to ensure the battery is within the correct range.
- Use an OBD-II scanner to read specific error codes and reset the system if needed.
- Loose Connections:
- Use a torque wrench to secure all bolts and terminals to the proper torque specification.
Maintenance Tips for NexPower V3 Sodium-Ion Batteries
- Regularly Monitor Battery Health: Use a diagnostic tool to monitor battery performance over time.
- Keep Connections Clean and Secure: Periodically check the terminals for corrosion or looseness.
- Avoid Overcharging: Sodium-ion batteries are resistant to thermal issues, but it’s still recommended to avoid excessive charging cycles.
FAQs
Q1: Can I install the NexPower V3 battery on my own, or should I hire a professional?
A1: While the installation can be done by individuals with experience in hybrid systems, we recommend professional installation for those unfamiliar with high-voltage components.
Q2: How long does the installation process take?
A2: On average, it takes 2 to 3 hours to complete the installation if all tools are prepared in advance.
Q3: Does the NexPower V3 battery come with a warranty?
A3: Yes, most suppliers offer a 3 to 5-year warranty for the NexPower V3 battery, depending on the retailer.
Q4: Is the sodium-ion battery compatible with other Prius models?
A4: Currently, the NexPower V3 is optimized for the Gen 2 Prius. However, future updates may include compatibility with newer models.
Q5: What is the expected lifespan of NexPower V3 batteries?
A5: With proper maintenance, the NexPower V3 can last 8 to 10 years, offering a longer cycle life compared to traditional battery options.


